Day off today, the weather forecast says its going to be nice n sunny, and I've got to go to the Allotment Federation meeting first thing (Pat as site secretary and me as site chairperson are expected to go), so I didnt manage to get to the plot until lunchtime, to find Lee and Colin had already started work on the first of our projects, the vine supports for the front of the shed! Lee had been to B&Q for the wood, wire and ground spikes (to hold the uprights) first thing, then he and Colin had met up at the plot to puzzle out the design I had in my mind, of course they soon realised its best not to really start until I got there, as they knew they'd only get it wrong! Lol!
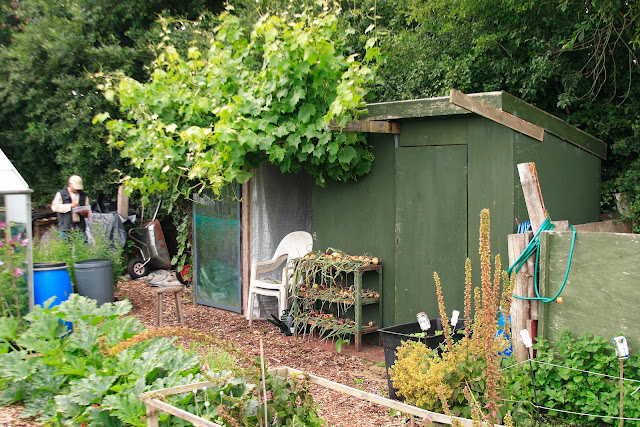
The grapevine on plot 1 (at the front of the shed) was one we inherited with the plot, and its always been very vigorous with its growth, so much so that last year I put some supports out from the front of the shed to help keep it up, but its now grown beyond them (as you can see), so the idea of building an arbour at the front of the shed and training the grapevine to grow over it was one we had been toying with for a while. When we picked up 2 clematis at Aldi last week that then gave us the incentive to get it done asap, as the clematis could then go into the bed at the front of the shed and grow up the arbour supports!

So, the plans were to get 3 new pieces of 2 by 2 timber and ground spikes (to prevent them rotting) for the uprights, and use some of the 2 by 1 1/2" timber that we already had on the plot (another inheritance that came with the plot) to build the horizontal pieces to link the uprights together and tether the whole lot onto the shed! The first upright was easy, in line with the end of the shed and at the edge of the bed in front of the shed, but the opposite end one was a bit more problematic!
The other end upright was sited just 6" away from the greenhouse, and just to the right of the greenhouse door, so although easy enough to put the spike in, it made screwing the wood crosspieces togather a bit difficult!
The middle upright was much easier, just measure the spacing from the ends with the wood we want to use as front crosspieces and hammer the spike in!
So, 3 uprights in, time for lunch? Pat and Colins turn to provide lunch, a couple of mugs of tea, fresh barm cakes with ham, cheese, salad and salami, sausage rolls and followed by homemade courgette cake! Mmmm!
The next job was to attach the side crosspieces to the shed and to the end uprights, this would not only make it sturdy, but also give us a level to work to with the front crosspieces!
As you can see, working above head height does have its problems, esp[ecially if you've only got one step ladder! Mind you, we did have a wooden stool that I did stand on to make it easier to hold the wooden crosspieces up whilst Lee and Colin drilled and screwed them, but after about 30 minutes it decided to disintegrate from underneath me, dropping me straight to the ground without even moving my feet!
Once the end crosspieces were secured, we set about attaching them to the end uprights, making sure they were completely level!
Then the front crosspieces were added, again making sure they were level! Once we'd done that we secured another central brace from the shed to the front middle upright, using a shelf bracket and piece of the inherited timber!
And then, as it was getting late, we called it a day! Tomorrow we are due to do the weekly bee inspections, then we want to add another 2 bracing bars (from the shed to the front crosspieces), 4 corner braces and then put in the wire supports from side to side and front to back! After that a dash of paint and we can then let the grapevine grow over it to its hearts content, plus get the 2 clematis into the bed and let them grow up the supports!
We're both really happy with the way its looking at the moment, and I do think its going to be really good once its finished, not only will it give the grapevine better support, look a lot better than it currently does, but will hopefully also give us a lovely shaded seating area for those few hot and sunny days when we are at the plot!
Lots of crops to harvest tomorrow, plus the bee inspections and the vine arbour to finish, so it looks like being a full day, but hopefully I'll get some more piccies to show you our progress!
Hope you like the 'vinery', hope your plots are looking great and cropping well! Thanks for reading!


No comments:
Post a Comment