FYI

Clicking on any of the pictures will open them at full size in the browser window, which means you will have to use the 'back' button to return to the main pages, whereas clicking to the left or right of any picture will open them in a new window, if you fancy a closer look at any of the piccies we've posted! We've included a Google Earth satelite picture of our plots and this years planting plan at the bottom of the page, next to each other. If you choose the Earth view on the satelite image you can rotate the image until it is lined up with the planting plan, then use the arrows in the plan to scroll from Plot 2 to Plot 1.
Showing posts with label play cup. Show all posts

Friday, July 16, 2010

Yayyy! First Honey harvest of the year!

Well, delaying the bee inspections until Thursday was a good idea, not only because it meant all 4 of us could be there (and thus cut the time in half by tackling an apiary for each team of 2), but also because weather wise, wednesday was a washout (thundery and heavy showers every 10 to 30 mins) and thursday, although not ideal (windy and cool, but less rain), was a much nicer day!

Lee and Colin tackled Apiary 2, whilst Pat and I did Apiary 1, its amazing how different each colonies behaviour is, from playful to relaxed, from feisty to aggressive, you quite quickly get an appreciation of thier personality and temperament!

Pat and I started with Hive 1 (formerly known as the Lazy Queen, but now renicknamed 'Psycho' - as the bees stung Sarah 4 times recently, and this week got me once on my inner thigh, que sharp intake of breath!!Mind you, its rumoured that bee stings can be beneficial, a lot of folks claim they ease the pain of arthritis!) Hive 1 was fine, if a bit feisty, a few play cups, and we saw the queen, they are now on 7 frames and filling the super with stores, so much better than they were only a month ago! Hive 2 (nicknamed 'the Incredibles' as the queen is incredibly productive, has masses of bees and is filling supers like mad) was calmer than Hive 1 (no stings!), and there were 8 frames of capped honey, which we removed (gently brushing the bees off before transfering the super frames to a spare super) and put into Pat and Colins car as quickly as we could! On checking the nucleus in Apiary 1, it still has bees in it, along with some stores, so we left them alone as its far too soon for the queen to have emerged as yet!

Lee and Colin started with Hive 4 (now nicknamed the 'Hippy Hive' - as the bees are sooo calm and relaxed they are almost horizontal, they must be stoned on poppy pollen or something!) which is doing fine, a really nice colony, next they looked at Hive 5 (now nicknamed 'Headbangers' as the flying bees kept 'nutting' Lee and Colin!), again this hive is doing well, with some stores almost capped and almost all the frames drawn out! Hive 6 (Stingray) was calmer than the last few weeks, and has some super frames that are almost 90% capped (which is when we can take them) and Hive 3 (nicknamed 'Popodopolis' as the bees keep gumming everything up with propolis) was at about the same temperament and the same position with the supers as Hive 6. The nucleus in Apiary 2 ws also checked, we saw the queen, a beautiful dark coloured lady, and there were eggs present, but not yet capped, so we should be able to tell next week (if there are worker cells present) if she was properly mated and whether the colony should be viable, in which case it will be going to its new home very soon after!

So, we managed to remove 8 supers of capped honey, which should be about 19lb or so, but as we've been asked several timews now, 'Once you have a super of capped honey, how do you convert it into something that is ready to eat (and sell on)?'

Well, as it was our first honey harvest of the year, we decided we'd extract the honey that night, so i managed to take some piccies and will detail the process below for those that are interested!

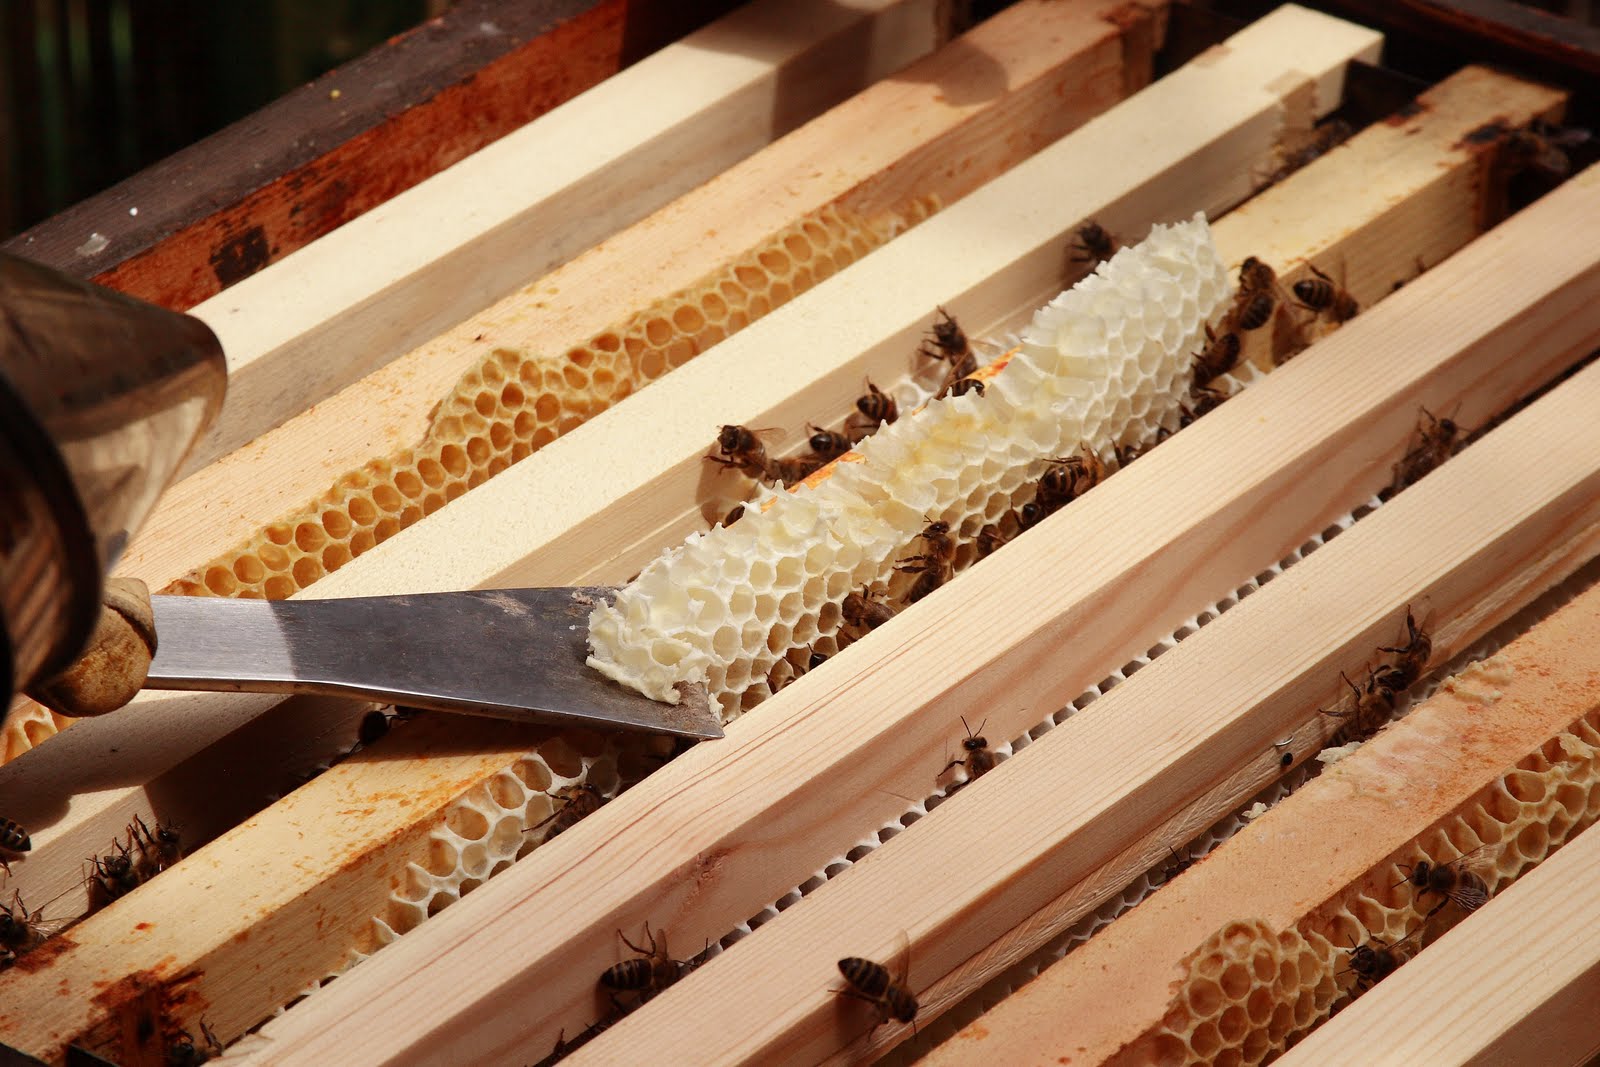
Obviously the first thing you need is the super frames of capped honey, as you can see here, the bees 'cap' the honeycomb containing the honey stores with a thin capping of wax.

The next thing you need is a way of uncapping the honeycomb, there are many ways of doing it, but for the hobby apiarist the main ones are to either use an uncapping fork (like a steel afro comb that can be used to prise off the caps in small batches, easy to use but very time consuming) or an uncapping knife (either a basic one like we have or a heated one - a lot more expensive).

The next thing you need is a way to get the honey out of the frames once they are uncapped. Most folks use some sort of centrifuge (these can range from cheaper food grade plastic ones, through to 4 frame manual tangential ones - like ours - to radial and electric powered ones (much more expensive)). The one we have is a food grade stainless steel one, and comes with an integral fine mesh filter and a settling tank with a tap!

Looking in from the top the spinner is designed to take 4 super frames at a time for extraction!

So, once you've got the kit, then its time to start! First thing to do is to put down some protection (as it can be a very sticky and messy operation), then standing your frame on a tray (to catch the cappings and the dripping honey) you use the knife (which has been warmed by immersing in very hot water - makes it easier to cut the wax) to gently cut away the capping.

The closer to the cap you can cut, the less mess and the easier it will be for the bees to repair any damage to the super frame when we give it back to them (so they can refill it)!

Almost there now Lee! After each frame is uncapped (on both sides) it is placed into the extractor, ready for spinning!

We all had a frame or two each to uncap, Pat and I chose ours first (so we got the nice flat ones), leaving Lee and Colin to uncap the more awkward shaped super frames! Lol!

So, once 4 frames are uncapped, they go into the extractor........

......... where the honey begins to drip out and run down the sloping base to the holes through the bottom to drip into the seive!

Next you fit the clear plastic lid (you dont have to, but its a good idea if you dont want to have to wash the whole kitchen down!)

Then the extractor is spun up to high speeds, firstly 1 way, then in reverse, then again the one way, then again in reverse, this ensures as much honey as possible is spun clear to drip down through the filter and into the settling tank! Once 1 side of the frames has been spun, then the 4 frames are reversed and the extractor is spun up again in the same way, to remove the honey from the other side of the frames! Time consuming, but ultimately worth it!

Once the honey has been spun out of the frames they look like this, a little damaged from where they've been spun against the mesh of the extractor, but the bees will soon repair it in no time once we give it back to them!

The cappings that were removed are then also seived into the extractor, and after the honey has dripped down into the metal seive (below the centrifuge section) we remove the spinner and wash it, whilst also using a spatual to ensure all the honey within the extractor has passed down into the bottom part! (Then like big kids we fought over who could lick the spatula clean! Lol!)

The integral metal seive catches any dislodged wax and ensures that the honey is not filled with bits of wax and dead bee!

And below the filter...... liquid gold, pure, fresh organic free range honey from our own hives! Generally the honey is then left to 'settle', allowing any air bubbles caused by the spinning extraction process to rise to the top and disperce, but as it was our first harvest of the year we couldnt resist filling a jar each!

The tap on the settling tank allows you to easily bottle the extracted honey, we only did 2 jars yesterday, the rest we are planning on bottling on Sunday (after work) as by them it will have settled and become even clearer than it is now! At this point we shuld have an idea of how much honey we managed to harvest, our estimate is about 18 to 20lb, not a great deal, but as Lee has some of his colleagues queing up to buy it, then we need to get some bottled asap for selling to them!

And finally....... the finished product! Doesnt it look good! And it tastes even better, much nicer than anything you can get from a supermaret (you wouldnt believe the difference in taste), plus you are eating something produced locally and which can have health benefits (particularly for those who suffer with hayfever, its been documented that eating local honey - produced within 30 miles of where you live - can help with hayfever symptoms!). Personally though, I enjoy it for its taste, and the fact that in selling some of the honey on we are then able to reinvest that money in both looking after the bees and in the allotment itself!

Last piccy for today, I pulled into the drive tonight to watch this cheeky chap eating our cherries, he sat there as bold as brass wioth one in his mouth! Methinks the cherry harvest needs to come in NOW!

Hope you enjoyed the post, that it gave you another insight into the mysteries of beekeeping and perhaps answered some questions that you'd always wondered about! Thanks for reading!

We're ont he plto tomorrow night after work, so I'll try and get some update piccies to show you.... along wiht some more harvests of course! Hope your crops are growing well and your plots are looking good!

Friday, July 09, 2010

Beekeeping Update 8th July 2010

Today we return to work after our holidays, Lee has already left to start at 730am, I'm on a Late shift today, so have to leave in a couple of hours, so please excuse us if the blog updates become a bit less regular than they have been for the past 2 weeks, working full time + looking after 2 full size allotments and 6 hives of bees does eat up a hefty amount of time, but rest assured, I will do my best to keep you updated of our progress on the plots!

Yesterday we did the inspections on our Bees, we currently have 6 hives in the 2 apiaries on our plots, the first apiary is on Plot 2, and the newer larger one (apiary 2) is on plot 1, confusing, but we know where they are!

Apiary 1 was first built in late 2008 / early 2009 (http://dobbyspumpkinpatch.blogspot.com/2009/05/building-apiary.html) and took our first 3 hives in June and July 2008, whereas apiary 2 was built in early 2010 (http://dobbyspumpkinpatch.blogspot.com/2010/05/17th-may-2010-update-piccies-more-bees.html)

So, onto the bee inspections! We inspect the bees for several reasons, to check their health, to see if there are eggs, larvae and sealed brood, to see the queen and to check for swarm signs such as play cups (empty cups that could be the beginnings of a queen cell) and queen cells. If left unchecked and a queen cell is capped, then the existing queen and a lot of the bees will swarm, which not only can be a nuisance, but also can result in their deaths if they dont find a suitable home within 3 days, as their honey supplies will then run out!

We started with Apiary 1, which contains Hives 1 & 2, both Smiths designs and the first 2 hives we got! Hive 1 is a smaller colony (we had fears they wouldnt survive the winter, but having made it through ok, we are willing to give them a chance to get established this year rather than requeening the colony), whereas Hive 2 is a very strong and productive colony!

Normally there's 4 or 5 of us to do the inspections, Pat and Colin, sometimes their daughter Sarah, and Lee and myself, so we usually split into 2 teams to tackle 1 apiary each, making the process a lot quicker than it would be if we all did it together, but as Pat and Sarah have gone away to Hampton Court Flower Show it meant with just the 3 of us present that we did the inspections together.

We started with Hive 1, which has a single brood box and a single 'super'.

The first thing to do is to check the floor inserts for signs of varroa drop. Varroa mite originated in the East, but was brought into the UK with imported bees, it is a main pest for the bees and can seriously weaken a colony, and natural UK bees have no defenses, so we have to take steps to keep the bees clear of varroa by treating once a year (in midwinter) with oxalyic acid and weekly by dusting them with icing sugar (it makes the bees give themselves a really good clean, which causes the varroa to fall off, and as we have mesh floors, the mites fall through the mesh and are expelled from the colony. Checking the floor inserts gives us a good idea of the quantity of varroa present, which fortunately seems to be very low at the moment!

Once the roof is removed we then remove the crown board, this keeps the bees in the hive and stops any unwanted visitors from getting in via the top.

Under the crown board are the 'supers' shallower boxes that hold shallower 'super' frames where the bees store their supplies, both honey and pollen. Depending on the hive you can have up to 7 supers on a colony, which the bees will fill with supplies, then 'cap' the honey with a thin layer of wax to keep the honey safe. Once a super is 90% capped it can be taken and the honey extracted in a centrifugal extractor, then filtered and bottled for our use. (If you'd like to take a look at a bit more info from the blog on how a hive is constructed, then take a look here http://dobbyspumpkinpatch.blogspot.com/2009/07/beekeeping-another-colony-homed-3-hives.html)

The bees not only draw out the foundation to make the cells, but also build 'bridging comb', which makes removing the frames for examination difficult and is generally removed (the wax is then extracted and used for making lip balm, furniture polish and candles).

Lee inspecting a super frame to see how they are doing with the honey. The bees work on the honey to reduce its moisture content so that it wont ferment and go off, once the moisture content is right for storage, then they cap the cells, and once all the frames are fully capped, then any excess honey can be harvested by the beekeeper (each hive generally needs a full brood box and super of honey stores to see them safely through the winter), this frame is partially capped, with thin white veneer of wax to keep the honey fresh and the moisture content correct for storage!

Removing the bracecomb!

Next we remove the super to reveal the queen excluder and brood box! The queen excluder stops the larger queen from going into the supers and laying eggs in with the honey stores, which makes it easier to take the honey without damaging the health of the colony by having eggs, grubs and larvae mixed in with the honey that you are trying to extract!

Worker bees in the hive!

The queen is much larger than the workers or drones, the longer bee in the center of the pic (marked with a green dot which denotes she is last years queen) is the queen in Hive 1.

A drone, more bulky and 'square' in shape than a worker, these male bees have only 1 purpose in life, to mate with a queen.

A drone amongst the workers!

Once we are happy with the inspection (that we've seen eggs, larvae and capped worker brood or seen the queen - not always possible), then we treat the brood box with icing sugar, sifting it through a mesh to dust the bees and make them have a good clean in the hopes of controlling varroa mite infestation.

Once dusted the bees take on a different aspect, looking a bit like 'ghost' bees!

Cleaning themselves nicely!

After that the hive is reassembled and left alone for another week, happy in the knowledge that the bees are ok.

Hive 2 is our strongest colony, the queen is that productive we've had to give her a super to lay in aswell as the brood box (hence the green band of the queen excluder is above the bottom brown super box. This hive now has 5 supers, 4 of which are drawn out and filled / partially capped / almost filled, with 1 new one that we added today!

In the center of the picture is the queen on this hive, shes a great producer, laying thousands of eggs a day!

In doing the inspection in here we did find some 'play cups' pictured here next to some capped drone brood (the drone brood is much taller and domes, whereas the worker brood is almost flat to the frames. Any play cups are best removed, by squishing them with a hive tool.


This worker bee decided to investigate the taste of my gauntlet!

So, onto Apiary 2! From Left to Right, Hives 4, 5, 6 (Stingray), our original Hive 3 (that swarmed earlier this year and we rehomed into the National its not living in) and a nucleus box (homemade of course!) Hives 4 and 5 are smiths design, but Hives 3 and 6 are both the more popular (at least locally) National design, they both use similar frames (but the smiths have shorter lugs), the main differences are the exterior design (smiths have routed handles - usually- and Nationals have an extra piece of wood on the sides that make a bigger handle) and the position of the 'beespace', smiths have a top bee space, whereas national hae a bottom beespace! (The beespace is 1/8", and allows the bees to transit the space easily, any larger and they will fill it with braceomb, any smaller and they cant get in, so will seal it with bracecomb and propolis!

All was well in Hives 4, 5 and 6, but on opening Hive 3 we found 2 queen cells, this capped one......

.......... and this uncapped one. The 2 bees to the left of the queen cell are newly emerged worker bees, which stay in the hive for their first couple of weeks, acting as nurse bees by feeding the larvae and building any comb that needs to be drawn out.

Looking in from the uncapped end you can just see the queen larvae. The egg is fed with royal jelly for 5 days, then the grub growns on until the cell is capped and the new queen emerges 9 days later. If left with nothing done, a colony with a queen cell will normally swarm, so depending on time of year (after early July has passed it is unlikely the new nucleus will have enough time to get established and set down enough stores to see them through the winter) you can either split the colony, or later in the year we sadly have to remove the queen cells.

These 2 cells (along with a frame of stores, a frame of eggs and a frame of brood) were placed in a nucleus box and moved into apiary 1, its a bit late to take a split, but hopefully there will be just enough time for them to establish themselves, ready for the winter!

The new nuclues in apiary1.

Once finished its wise to check yourself for bees before removing your protective suit, as you can see here, Lee has a few bees investigating him!

So, thats the inspections done for another week! Hope it was of some interest, and thanks for reading!

Thursday, June 24, 2010

Yayyy! Holiday Time! 2 weeks off work & time to play on the plots!

Well, the Solstice has passed, summer is officially here and everything is growing well! We're on holiday for 2 weeks now, so should be spending a lot of time on the plot, weeding, sorting the paths out and rebarking them to tidy up ready for the judging in 2 to 3 weeks time! We're also hoping to get a couple of days away at Shell Island (www.shellisland.co.uk)

Plot 2 is virtually full, with only 1 small bed to clear and plant up, and all the crops are growing on really well! As you can see here the broccolli at the front is really coming on well, the spuds behind are flowering and growing really well (with no sign of blight as yet), the onions and garlic (behind the greenhouse to the right) are looking good (should be harvesting in the near future), and the sweetcorn n squashes are looking fab!

As you can see here, the sweetcorn is thickening up really well, anytime now they will shoot up and start to produce cobs, with any luck we should get a couple of cobs per plant, so hopefully this year we'll have lots to harvest (with 140 plants), and the sunflowers and squashes/pumpkins that are also in that bed are doing well! Hopefully the sunflowers will keep the local squirrels occupied so they leave our sweetcorn alone!

The area surrounding the pond has again been a bit neglected, some of the plants we put there last year have done really well, especially the lemon verbena, variegated sage and some of the foxgloves and mint, but there's also a few weeds and nettles, so one of the jobs I want to tackle this week is to clear the weeds and plant up some other useful plants, especially ones that the bees can use for food! Any suggestions?

Plot 1 is also looking good! The broad beans and peas are cropping well, the borlotti, runner and french beans are growing well and should start to flower soon, the brassicas are doing really well, the strawbs are cropping well and the courgettes are beginning to produce fruit! We've a bit of work on here to get the paths weeded and rebarked, plus a bed to clear and some weeding to do, but hopefully by the time we finish our hols then we should be looking really good!

The first sowing of broadies is cropping nicely, and the second sowing of 24 plants is now flowering, so we should have a good successional crop from these!

The first courgette! We've 2 at about this size, and another 12 or so smaller ones forming, hopefully they will again produce a bumper crop of tasty frsh organic courgettes! With 13 plants growing, its possible we may well face a glut this year!

The peppers, aubergines and chillies in the hot house are also growing well, with plenty of flowers and the first few pepper and chilli fruits forming, along with a few volunteer spuds in the bed! The 2 greenhouses and the polytunnel are also doing well, the weed control fabric we've planted through seems to be doing a good job at keeping the weeds under control, and the first few toms are now golf ball sized, with plenty more flowers also present! Hopefully we'll be eating fresh toms soon!

The final planting of cabbages is growing on nicely, the earlier sown ones are also going well, with the first batch not too far from beginning to heart up, hopefully we'll be harvesting some of these soon!

The brussell sprout bed is also looking good, the 27 plants are growing nicely, should have enough sprouts to see us through the winter, but still a long way to go before they are harvested!

So, ontop the veg plot balance sheet!

Total Veg Plot Costs 2010

Rent + Subs for 2 full plots £100
Seeds £20
Seed Spuds £20
Onion Sets £6
Growbags £15
Chicken Manure Pellets £8
Plastic 'wannabe' Polytunnel £61
Bamboo Canes £8

Total Costs £ 238

Total Veg Plot Harvests 2010

Rhubarb £ 25
Fartichokes £ 4
Volunteer Spuds £8
Lettuce £2
Radish £2
Garlic £15
Strawberries £10
Peas £4
Broad Beans £4

Total Veg Plot Harvests £ 74

So we're still £164 short of breaking even for the year, but a long way to go until we've even really begun to bring in the harvests!

Beekeeping Update!

With us now having 6 hives for ourselves and 1 nucleus that will be going to a new beekeeper in the near future we've found that its best if we split into 2 teams to do the inspections (usually the girls team of Pat, Sarah - Pat and Colins daughter - and me doing apiary 1 (our original apiary with hives 1 and 2 plus the nucleus in it) and Lee and Colin doing apiary 2, with hives 4, 5, 6 and 3 in it), as that way we can do both apiaries in about an hour and a half, rather than it taking all of us about 4 hours to do the inspections!

Apiary 1

Sarah started to do Hive 1 (Smiths hive), with Pat and myself assisting, she was stung within 5 minutes (through her jeans), but soldiered on to complete the inspection! This hive was the first one we got, and has been a worry since we got them, as the Queen doesnt seem to want to build up the bees numbers as well as the other hives. We've had the bees tested for disease, and nothing was evident, so we've not taken any action other than feed them and give them already drawn out frames. This week we found that there are now bees on 5 frames, and plenty of stores being laid down, plus 2 play cups (the start or a queen cell that they produce ready for swarming or superceeding the existing queen), which are the first that we've ever seen in this hive! Things are looking up in here, so its possible shes decided to get a move on and we may have to change her nickname from 'lazy queen'!

Hive 2 (another Smiths Hive) is our most prollific, the queen in here is a fantastic layer (again this is one of our original colonies, but not the original queen as we lost her in a swarm last year), last week we decided to give her more room to lay in, so put another super on, but this time below the queen excluder to allow her more room to lay. In the space of a week its been almost completely drawn out and filled with eggs, grubs and stores! This hive has 4 supers on it now, with 2 completely full and partially capped (once fully capped we can take some for harvest) supers of honey!

We found lots of play cups, but also 2 fully developed (but not capped) queen cells, so given that its possibly getting late in the season for a division to build up ahead of the winter we decided to put these plus some eggs, brood and stores into a nucleus, giving us another split to hopefully pass onto another new beekeeper! This may be our last chance to get a division this year, tho our Hive 3 was a late swarm last year (mid august), so the old adage of 'Aswarm in May is worth a field of hay, a swarm in June is worth a silver spoon and a swarm in July isnt worth a fly!' isnt always correct!

The nucleus in this apiary (which was the split left behind when Hive 3 swarmed a few weeks ago) is doing really well, we rehomed it into a hive last week, and the bees are calm and very productive, now occupying 6 frames and having already capped a full frame of honey! The queen had been nicknamed 'speedy' as she is a very fast mover on the frames! We recon this is going to be a great hive for the girl who is having it next week when she gets back from her holidays!

Apiary 2

Lee and Colin started in Apiary 2 (which is on plot 1, confused yet?), with hives 4 and 5 (4 to the left in this pic and 5 to the right) both of which are Smiths Hives and contain splits from Hive 2. Both have 2 supers on and have bees on 7+ frames, they both seem to be doing well, with a full super each and the second super filling up nicely!

Hive 6 (to the left of this picture, a National Hive with 3 supers on, contains the first split we took from Hive 3) is the hive thats been nicknamed 'stingray', its stung one of us the past 2 times we've been doing an inspection, and today it struck again, with Sarah getting it twice (again through her jeans). Although the bees are a bit feisty in here, they are good producers, so we're keeping the queen in there for the moment, but if things become bad, then we may have to consider requeening them!

Hive 3 (to the right of the picture, another National Hive and the original queen that swarmed from Apiary 1) is also going really well! Since being rehomed in the new National only 4 weeks ago they've completely drawn out the brood box and 2 supers, and today had another super put on it as the other 2 are now full of uncapped honey!

Watching the bees come and go is absolutely facinating, all of us agree we could stand and watch them for hours at a time!

So, the 6 hives we are keeping now have a total of 15 supers on them, in varous stages of being filled and capped. Once they are capped off then we'll be removing some to harvest, and at 22lb (on average) of honey per super, then there's a potential 330lb of honey currently on the hives. With the late flows of ivy and himalayan balsam still to start (at which point the girls could fill a drawn out super in a week - weather depending - for about 4 or 5 weeks), then its possible we may yet get a significant harvest from the girls this year, although we are definitely going to leave them with a full super of capped honey per hive for the winter!

Our Beekeeping Balance sheet is beginning to look a bit healthier, with an total outlay of approx £3000 and a total income this year of £300 (once the 3 nucleii have gone), plus the 3 new colonies we've been able to split into hives this year, (worth in effect £450+) and factoring in the 18lb of honey we harvested last year - worth approx £90, then our total equivalent yield so far is £840, with the honey harvest yet to start! Even if we dont get any more supers filled this year (a highly unlikely scenario), then we should be able to harvest 9 supers of honey (leaving 1 super per hive for the winter) which should yield about 200lb of honey, worth about £900 to £1000, which will bring our yield to approx £1740, or just over half way to breaking even!

Hope your veg is growing well, your fruits are setting and your crops are growing well!

More updates to follow soon!